Apple has spent years quietly turning the iPhone into one of the most capable handheld recording devices on the market. The built-in microphones are good enough for casual videos and quick voice memos, but anyone serious about podcasting, content creation, journalism, or music recording knows they have limits. That is where external microphones come in, and connecting one to an iPhone in 2026 is no longer the headache it used to be.
Whether you are filming a YouTube short on your iPhone 16, recording an interview on the new iPhone 17 Pro, or trying to get studio-grade audio out of an older Lightning-equipped device, this guide walks through every option, every cable, and every setting you need to know.
Why an External Microphone Makes a Difference
The iPhone’s onboard microphones are tuned for general use. They handle voice calls, FaceTime, and Voice Memos perfectly well, but they pick up everything around them, including wind, room echo, fabric rustle, and traffic. External microphones solve this in three ways. They have larger diaphragms that capture more detail, they use directional pickup patterns that reject noise from off-axis, and they sit closer to the source, which improves the signal-to-noise ratio dramatically.
For anyone shooting video on a recent iPhone Pro model, the difference between built-in audio and a clip-on lavalier is the difference between an amateur clip and something that genuinely competes with professional camera setups.
Know Your Port: Lightning vs USB-C
Before buying anything, check which port your iPhone uses. This is the single most common source of confusion when shopping for a microphone.
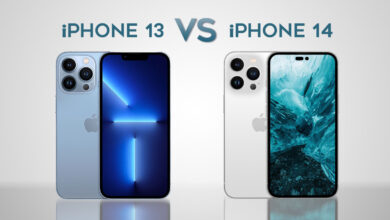
Apple began transitioning the iPhone lineup to USB-C with the iPhone 15 series in late 2023. Every model released since then, including the iPhone 16 and 17 ranges, uses USB-C. Older devices, including the iPhone 14, iPhone SE, and anything earlier, still rely on Lightning. If you are torn between models or considering an upgrade, our breakdown comparing the iPhone 17 against the iPhone 16 covers the port change in detail along with what it means for accessories.
Why does this matter? A Lightning microphone will not work on a USB-C iPhone without an adapter, and vice versa. Some manufacturers sell dual-port versions; others lock you in. Always read the spec sheet before checking out.
Types of External Microphones That Work With iPhone
There are four main categories worth knowing.
Lavalier microphones are the small clip-on mics you see on news anchors and YouTubers. They are ideal for interviews, talking-head videos, and presentations. Popular options like the Rode SmartLav+ plug straight into the headphone adapter via TRRS, while newer wireless models such as the DJI Mic 2 connect digitally.
Shotgun microphones mount on top of the iPhone (usually via a cage or rig) and capture sound from whatever the camera is pointed at. They are excellent for run-and-gun video and vlogging.
USB and digital microphones connect through the Lightning or USB-C port and bypass the iPhone’s analog circuitry entirely. These give the cleanest sound, particularly for podcasting and music recording. The Shure MV7+ and Rode NT-USB Mini are widely recommended.
Wireless lavalier systems have exploded in popularity. Brands like DJI, Rode, and Hollyland sell two-mic kits with built-in transmitters that plug into the iPhone via USB-C or Lightning. They are the go-to choice for solo creators in 2026.
How to Connect an External Microphone to iPhone
The process depends on the type of mic, but the core steps are the same.
- Identify your iPhone’s port (Lightning or USB-C).
- Match your microphone’s connector to that port, or buy the correct adapter. Apple sells official Lightning to 3.5mm and USB-C to 3.5mm adapters, and most reputable third-party brands offer MFi-certified versions.
- Plug the microphone in. iOS will detect it automatically; there is no driver installation or pairing required for wired mics.
- Open your recording app of choice. The app should switch to the external input automatically. If it does not, check the input settings inside the app.
- Record a short test clip and play it back through headphones to confirm the audio source is correct.
For wireless systems, the process is slightly different. You plug the receiver into the iPhone, power on the transmitter, and the two pair within a few seconds. Most modern kits remember each other after the first connection.
If you ever run into a power or compatibility issue, Apple’s official iPhone support documentation covers accessory behaviour and known fixes for each iOS version.
iOS Settings and Recommended Apps
iOS itself does not expose a global microphone input selector. Instead, each app controls its own input. The stock Voice Memos app works fine for basic recording, but power users should consider apps like Ferrite, GarageBand, MOTIV by Shure, or Rode Reporter, all of which offer level meters, gain control, and high-quality file formats.
Make sure the recording app has microphone access enabled in Settings, Privacy and Security, Microphone. Without this permission, the iPhone falls back to the built-in mic even if an external one is plugged in.
Troubleshooting Common Issues
If your microphone is not being detected, run through this checklist:
- Confirm the connector matches your port and is fully seated.
- Use an MFi-certified adapter if you are routing through a 3.5mm jack. Cheap unbranded adapters often fail the iPhone’s authentication handshake.
- Check that the recording app has microphone permissions enabled.
- Restart the iPhone with the mic still connected.
- If audio sounds muffled or one-sided, the mic may be wired for TRS (camera) rather than TRRS (smartphone). A simple TRS to TRRS adapter fixes this.
Buying a Microphone for an Older or Refurbished iPhone
Plenty of creators still use older iPhones for content work, and there is no reason to upgrade if the device handles your workload. If you are sourcing a Lightning-era iPhone secondhand, the refurbished market has matured significantly. In Australia, Phonebot stocks tested and warrantied iPhones at well below retail. New Zealand buyers often turn to PB Tech, while shoppers in Europe lean on Refurbed (based in Ireland and Austria) for similar peace of mind. Wired offers another reputable option for refurbished Apple gear in select regions.
Buying refurbished is not just about saving money. It also means you can put the difference toward a better microphone, which makes a much bigger impact on audio quality than a newer phone ever will. If you are weighing the trade-offs, our explainer on the difference between refurbished and used iPhones breaks down what each label actually means and which one offers better long-term value.
Frequently Asked Questions
Can I use any USB microphone with an iPhone? Most class-compliant USB microphones work, but some draw too much power. If your mic is not detected, try a powered USB-C hub between the iPhone and the mic.
Do I need an MFi-certified microphone?
Not strictly, but MFi certification guarantees compatibility and avoids the “this accessory is not supported” warning that some unbranded adapters trigger.
Does the headphone jack still work on iPhone?
No iPhone has a 3.5mm headphone jack. You need an adapter from Lightning or USB-C to plug in older analog microphones.
Can I monitor audio while recording?
Yes, with a wireless mic kit that has a dedicated headphone output, or via a USB-C splitter that supports passthrough audio.
Will an external mic work with the front camera?
Yes. iOS treats the input separately from the camera, so the same microphone works for selfie video, rear-camera shooting, and audio-only recording.
The Bottom Line
Connecting an external microphone to iPhone is straightforward once you know your port and your purpose. Match the connector, pick the right type for your use case, and check your app settings before you hit record. Whether you are running a podcast, filming reels, or recording your band’s next demo, the right mic will do far more for your final output than any software trick or AI cleanup tool. Apple has built the hardware foundation; it is up to you to feed it clean audio.